> ## Documentation Index
> Fetch the complete documentation index at: https://docs.whop.com/llms.txt
> Use this file to discover all available pages before exploring further.
# SaaS
> Learn how to build and run your SaaS on Whop
Use license keys to gate access to your software.
Let users sign in via email and validate access with the SDK.
## Email login integration
If you have an existing SaaS or are building a new one, you can use Whop to direct your customers to pay and let them manage their membership.
To integrate, all you have to do is adjust your `User` table to include the `whop_user_id` and `whop_username` columns.
| Column | Type | Description |
| --------------- | ------ | ------------------------------------------------ |
| `whop_user_id` | string | Unique identifier for the user provided by Whop. |
| `whop_username` | string | The user's Whop username for displays and logs. |
**Note**
Use the `users.checkAccess` method from the Whop SDK, as shown in Step 6. Pass the `whop_user_id` and the relevant product ID to determine whether the user can access your software.
If you would prefer to not have manage your own user table or even a database, consider building a Whop app here.
## Get your SaaS live on Whop:
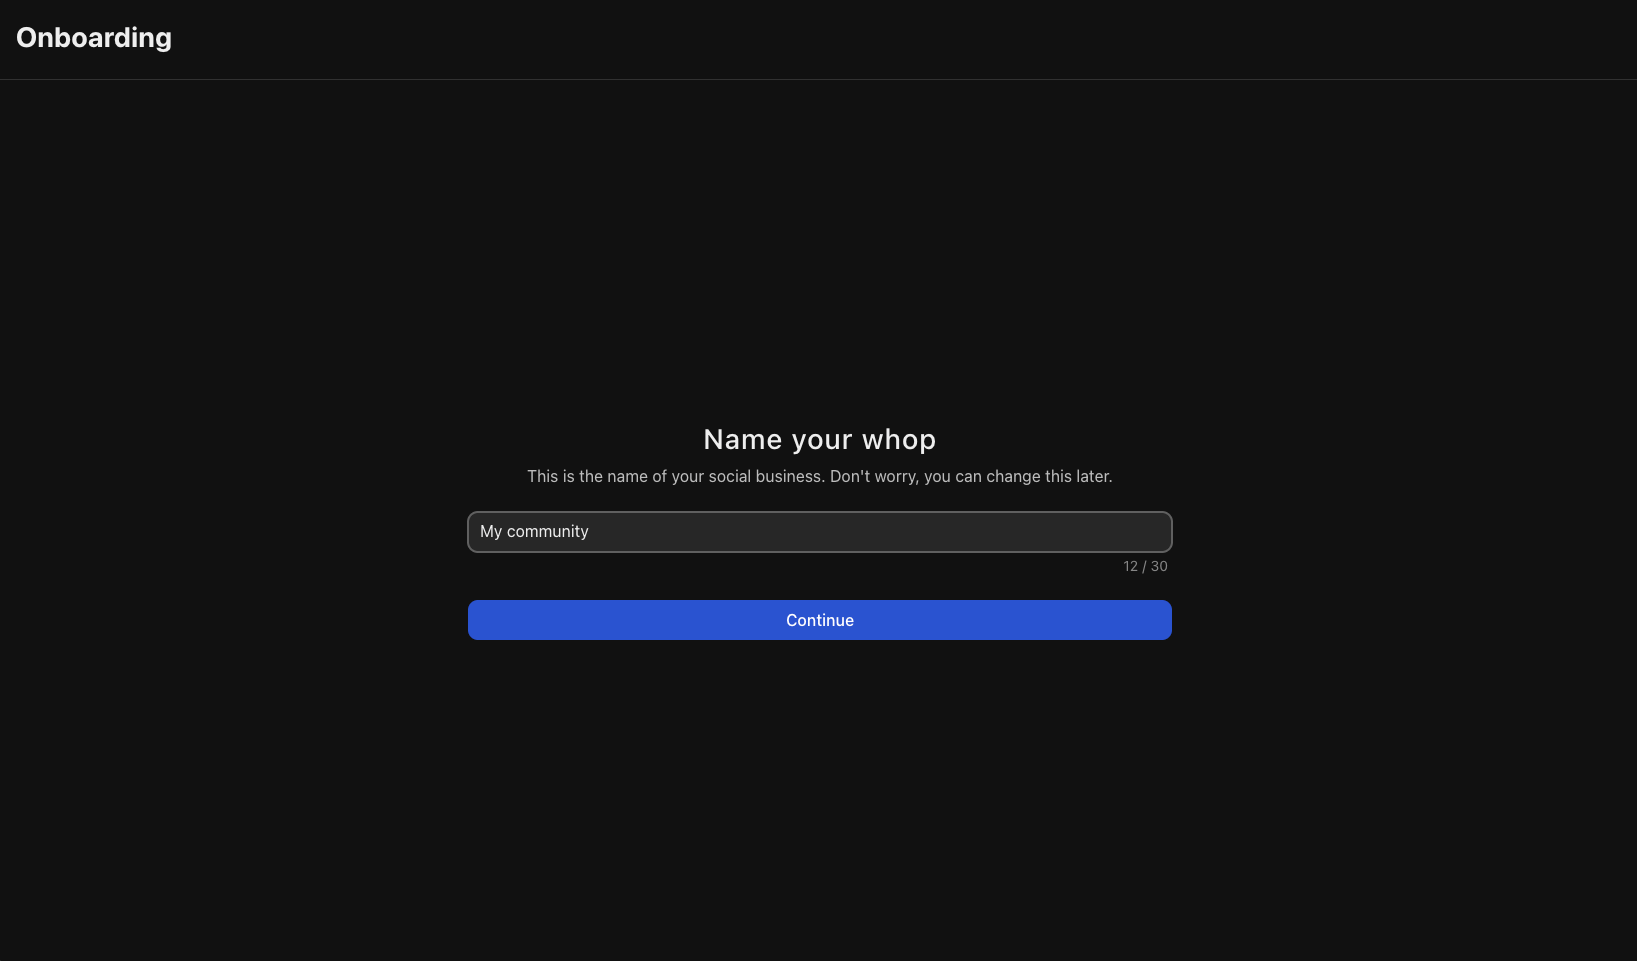
Head over to [**whop.com/sell**](https://whop.com/dashboard/start/):
* Choose a name for your SaaS
* Select your custom URL
* Complete the basic setup
Your whop is now live and ready to customize.
 * Go to your Dashboard
* Go to Products
* Select Add Product
There are two primary ways to send customers to checkout: an embedded checkout or a hosted checkout link.
### Embedded checkout
Follow these two steps to embed the checkout on your page. First, include the Whop Checkout loader script:
```html theme={null}
```
Then, add the checkout element where you want it to appear. Replace `plan_XXXXXXXXX` with your actual plan ID from the dashboard.
```html theme={null}
```
### Hosted checkout link
Alternatively, you can link customers to Whop’s hosted checkout page. You can get this link from your dashboard or generate one programmatically and link to the `checkoutUrl` it returns (as shown in Step 6).
```html theme={null}
Buy now
```
If you would like to programmatically create a checkout session, you can do so with the following code:
```typescript pages/api/create-checkout-session.ts theme={null}
import { whop } from "~/lib/whop-sdk";
export async function createCheckoutSession() {
const checkoutConfig = await whop.checkoutConfigurations.create({
plan_id: process.env.NEXT_PUBLIC_PREMIUM_PLAN_ID!,
metadata: {
customKey: "customValue",
},
});
return checkoutConfig;
}
```
When you receive the webhook (see below), you can use the `metadata` object to access the custom key and value you attached to the checkout session.
In your dashboard, go to **Developer → API keys** and create an account API key. This key acts on behalf of your account (your business), so keep it server-side and never expose it in client code.
Go to the dashboard section and add a webhook.
```typescript lib/whop-sdk.ts theme={null}
import Whop from "@whop/sdk";
// Instantiate the Whop SDK client with the account API key you created in
// "Developer → API keys". Server-side only — never expose this key to the client.
export const whop = new Whop({
apiKey: process.env.WHOP_API_KEY!,
});
```
```typescript pages/api/validate-access.ts theme={null}
import { whop } from "~/lib/whop-sdk";
// Validate that a signed-in user has access to your premium product before
// letting them use your SaaS feature.
export async function validateAccess(whopUserId: string) {
const result = await whop.users.checkAccess(
// Product ID you want to gate behind (prod_ tag, Dashboard → Products)
process.env.NEXT_PUBLIC_PREMIUM_PRODUCT_ID!,
// The Whop user we stored in our database
{ id: whopUserId },
);
return result.has_access; // boolean; access_level is "customer", "admin", or "no_access"
}
```
You can link users here to manage their membership: [https://whop.com/@me/settings/memberships/](https://whop.com/@me/settings/memberships/).
They can simply login with the same email and they use to access your SaaS without a password.
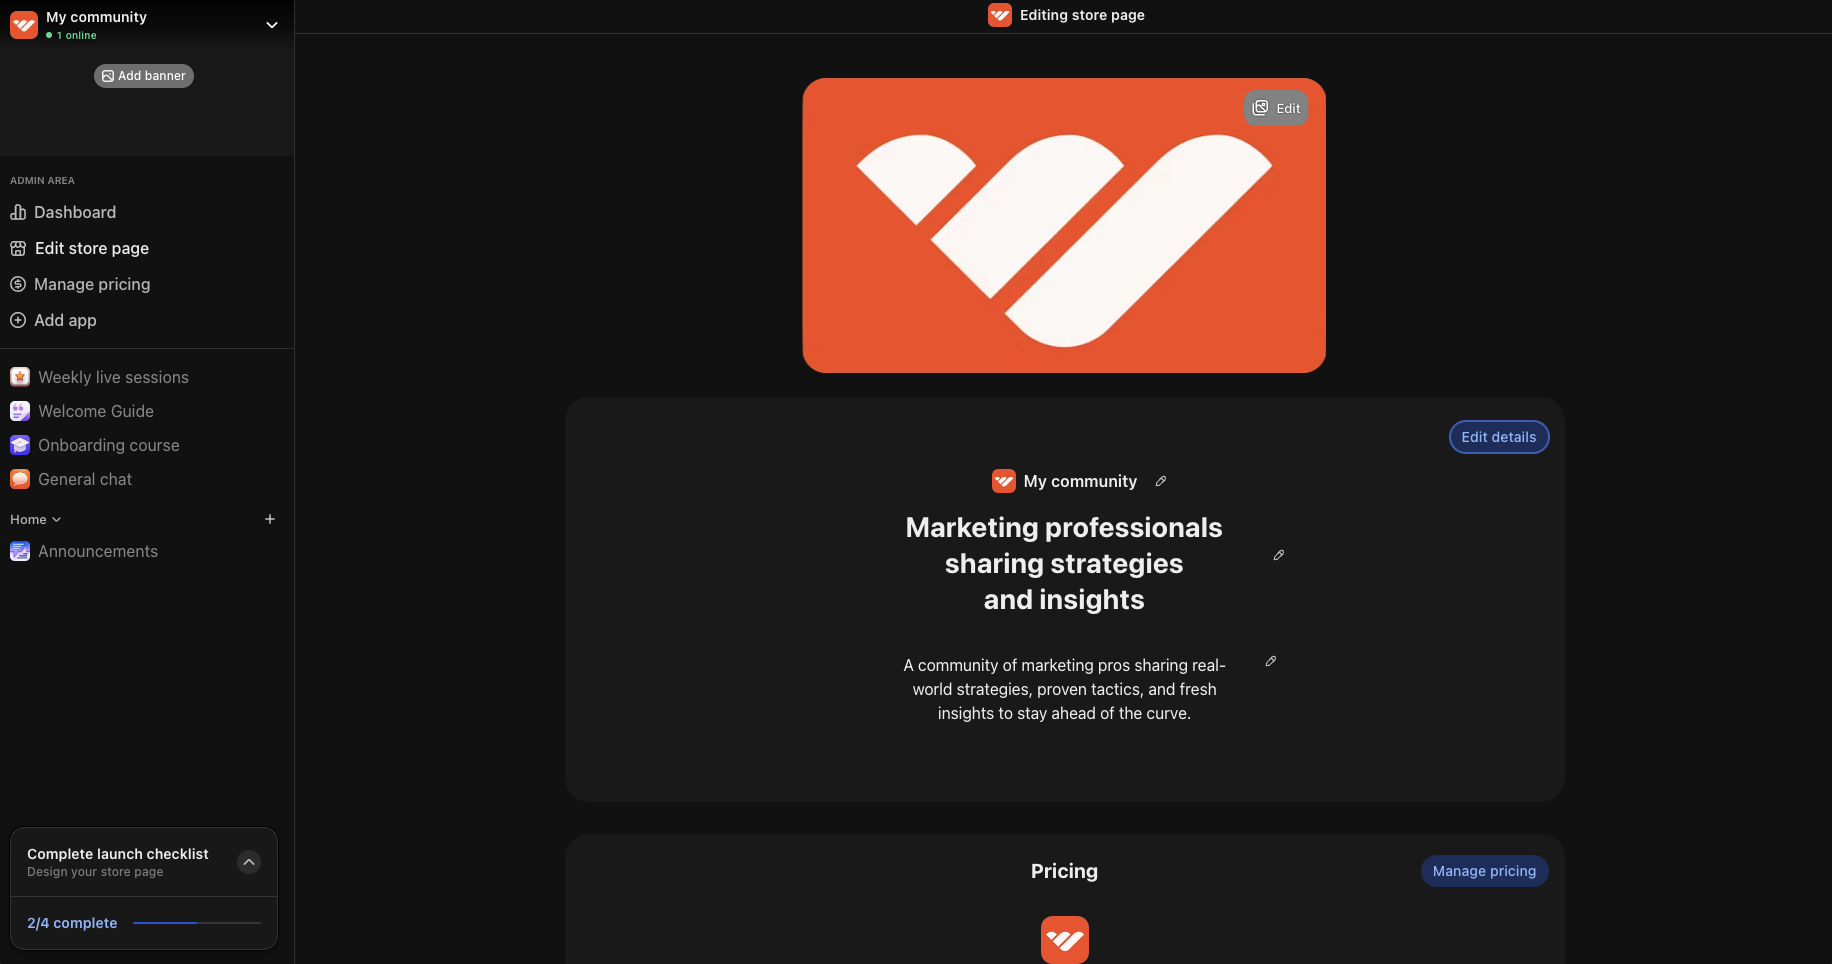
Your store page is where people can learn about your offer. Select your whop name in the top left, then select **Design store page** to open the editor. Select **Edit details** to customize:
* **Choose a clear name and headline:** Make it immediately obvious what your community offers and who it's for. Examples: "Marketing professionals sharing strategies and insights" or "Fitness enthusiasts building accountability and motivation"
* **Write a compelling description:** Focus on the value members receive and how your community will help them achieve their goals. Highlight specific benefits like exclusive content, expert guidance, peer connections, and ongoing support
* **Upload a logo:** Add a clean, simple logo to your store page
* **Add gallery images or video:** Images of events, member success stories, or a brief welcome video help potential members get to know you and what to expect when they join
* **Select the appropriate category:** This helps people discover your community when browsing Whop
* Go to your Dashboard
* Go to Products
* Select Add Product
There are two primary ways to send customers to checkout: an embedded checkout or a hosted checkout link.
### Embedded checkout
Follow these two steps to embed the checkout on your page. First, include the Whop Checkout loader script:
```html theme={null}
```
Then, add the checkout element where you want it to appear. Replace `plan_XXXXXXXXX` with your actual plan ID from the dashboard.
```html theme={null}
```
### Hosted checkout link
Alternatively, you can link customers to Whop’s hosted checkout page. You can get this link from your dashboard or generate one programmatically and link to the `checkoutUrl` it returns (as shown in Step 6).
```html theme={null}
Buy now
```
If you would like to programmatically create a checkout session, you can do so with the following code:
```typescript pages/api/create-checkout-session.ts theme={null}
import { whop } from "~/lib/whop-sdk";
export async function createCheckoutSession() {
const checkoutConfig = await whop.checkoutConfigurations.create({
plan_id: process.env.NEXT_PUBLIC_PREMIUM_PLAN_ID!,
metadata: {
customKey: "customValue",
},
});
return checkoutConfig;
}
```
When you receive the webhook (see below), you can use the `metadata` object to access the custom key and value you attached to the checkout session.
In your dashboard, go to **Developer → API keys** and create an account API key. This key acts on behalf of your account (your business), so keep it server-side and never expose it in client code.
Go to the dashboard section and add a webhook.
```typescript lib/whop-sdk.ts theme={null}
import Whop from "@whop/sdk";
// Instantiate the Whop SDK client with the account API key you created in
// "Developer → API keys". Server-side only — never expose this key to the client.
export const whop = new Whop({
apiKey: process.env.WHOP_API_KEY!,
});
```
```typescript pages/api/validate-access.ts theme={null}
import { whop } from "~/lib/whop-sdk";
// Validate that a signed-in user has access to your premium product before
// letting them use your SaaS feature.
export async function validateAccess(whopUserId: string) {
const result = await whop.users.checkAccess(
// Product ID you want to gate behind (prod_ tag, Dashboard → Products)
process.env.NEXT_PUBLIC_PREMIUM_PRODUCT_ID!,
// The Whop user we stored in our database
{ id: whopUserId },
);
return result.has_access; // boolean; access_level is "customer", "admin", or "no_access"
}
```
You can link users here to manage their membership: [https://whop.com/@me/settings/memberships/](https://whop.com/@me/settings/memberships/).
They can simply login with the same email and they use to access your SaaS without a password.
Your store page is where people can learn about your offer. Select your whop name in the top left, then select **Design store page** to open the editor. Select **Edit details** to customize:
* **Choose a clear name and headline:** Make it immediately obvious what your community offers and who it's for. Examples: "Marketing professionals sharing strategies and insights" or "Fitness enthusiasts building accountability and motivation"
* **Write a compelling description:** Focus on the value members receive and how your community will help them achieve their goals. Highlight specific benefits like exclusive content, expert guidance, peer connections, and ongoing support
* **Upload a logo:** Add a clean, simple logo to your store page
* **Add gallery images or video:** Images of events, member success stories, or a brief welcome video help potential members get to know you and what to expect when they join
* **Select the appropriate category:** This helps people discover your community when browsing Whop
 ## License key integration
After a purchase, each user receives a unique license key that unlocks the product. Require users to enter this key before they access the product. You can also validate the current key before enabling specific application features.
## Getting started
1. Add the software app to your whop [here](https://whop.com/apps/app_jHH5YT7jHYQANi/install/).
2. Select configure in the new software app you added
3. Add software name and download link
### Validate license keys
If the license key metadata is empty, the key isn't yet bound to a computer. Whop's API returns status code `201` to confirm that the key is valid. Your software can then grant access to the product. The API saves the metadata from the request on the license key.
```js typescript theme={null}
import axios from "axios";
const setMetadata = async () => {
try {
const response = await axios.post(
`https://api.whop.com/api/v2/memberships/${licenseKey}/validate_license`,
{
headers: {
Authorization: `Bearer ${accessToken}`,
},
body: {
metadata: {
key: "value", // This is initially setting the key/value pair if it doesn't already exist
},
},
},
);
return response.data;
} catch (error) {
throw error;
}
};
export default setMetadata;
```
### Validate matching metadata
When existing license key metadata matches the metadata your software sends, Whop's API returns a success response. This response confirms that the license key is valid. Your software can then grant access to the product. The API compares every metadata key-value pair and verifies that all fields contain the same data.
To limit each user to one session, store the user's hardware ID in the metadata as shown below:
**Client-side**
```json theme={null}
{
"hwid": "098H52ST479QE053V2"
}
```
**Server-side**
```json theme={null}
{
"hwid": "098H52ST479QE053V2"
}
```
### Validate mismatched metadata
If the stored metadata doesn't match the metadata your software sends, Whop's API returns status code `400`. This response means the license key is invalid, so your software can't grant access.
Below is example metadata that would return this error.
**Client-side**
```json theme={null}
{
"hwid": "30294GLDKJ54F0SLKF"
}
```
**Server-side**
```json theme={null}
{
"hwid": "098H52ST479QE053V2"
}
```
### Remove metadata
Users can reset their key's metadata from their orders. To reset it through the API, send an empty metadata body in a POST request to the [memberships endpoint](/api-reference/beta/memberships/update-membership).
## Next steps
Add apps to let your users learn how to use your software, chat with
each other, and even order merch.
## License key integration
After a purchase, each user receives a unique license key that unlocks the product. Require users to enter this key before they access the product. You can also validate the current key before enabling specific application features.
## Getting started
1. Add the software app to your whop [here](https://whop.com/apps/app_jHH5YT7jHYQANi/install/).
2. Select configure in the new software app you added
3. Add software name and download link
### Validate license keys
If the license key metadata is empty, the key isn't yet bound to a computer. Whop's API returns status code `201` to confirm that the key is valid. Your software can then grant access to the product. The API saves the metadata from the request on the license key.
```js typescript theme={null}
import axios from "axios";
const setMetadata = async () => {
try {
const response = await axios.post(
`https://api.whop.com/api/v2/memberships/${licenseKey}/validate_license`,
{
headers: {
Authorization: `Bearer ${accessToken}`,
},
body: {
metadata: {
key: "value", // This is initially setting the key/value pair if it doesn't already exist
},
},
},
);
return response.data;
} catch (error) {
throw error;
}
};
export default setMetadata;
```
### Validate matching metadata
When existing license key metadata matches the metadata your software sends, Whop's API returns a success response. This response confirms that the license key is valid. Your software can then grant access to the product. The API compares every metadata key-value pair and verifies that all fields contain the same data.
To limit each user to one session, store the user's hardware ID in the metadata as shown below:
**Client-side**
```json theme={null}
{
"hwid": "098H52ST479QE053V2"
}
```
**Server-side**
```json theme={null}
{
"hwid": "098H52ST479QE053V2"
}
```
### Validate mismatched metadata
If the stored metadata doesn't match the metadata your software sends, Whop's API returns status code `400`. This response means the license key is invalid, so your software can't grant access.
Below is example metadata that would return this error.
**Client-side**
```json theme={null}
{
"hwid": "30294GLDKJ54F0SLKF"
}
```
**Server-side**
```json theme={null}
{
"hwid": "098H52ST479QE053V2"
}
```
### Remove metadata
Users can reset their key's metadata from their orders. To reset it through the API, send an empty metadata body in a POST request to the [memberships endpoint](/api-reference/beta/memberships/update-membership).
## Next steps
Add apps to let your users learn how to use your software, chat with
each other, and even order merch.